- The Description of Imgx
- Tag: Image process Imgx BaishanCloud Cloud Storage
![]()
The Description of Imgx
Tag: Image process Imgx BaishanCloud Cloud Storage
URL Format
[http://imgx-ss.bscstorage.com/<bucket>/ <processing](http://imgx-ss.bscstorage.com/%3cbucket%3e/%20%3cprocessing) instruction>/<the File path>?<Signature>
OR
[http://<bucket>.imgx-ss.bscstorage.com/<processing]() instruction>/<The File path>?<Signature>
bucket: Your bucket name in Baishan Cloud storage.Processing Instruction: The processing instruction for the original image. There are some detailed instructions below.文件路径: The storage path of the original image.Signature: The main parameters of the Signature.
Example
Example: The URL of the original image is http://ss.bscstorage.com/imgx-test/demo/1.jpg?AWSAccessKeyId=acc_ drdrxp&Expires=2464773061&Signature=jFVHRSrOLeg5e3nIR00UE2vik0A%3D It shows
`- The bucket name is imgx-test `- The storage path of the bucket is demo/1.jpg
Operations:
`- Crop the face area and shorten the image to 400x400 -c
thumb,g
face,w
400,h
400` - Turn the image into a rounded corner with the maximum radius (perfect circle) - r_
max
`- Increase the brightness of the image by 8%e
brightness - 8` - Convert the image format to PNG - `f
png`
The Processing Instruction: c_
thumb,g_
face,w_
400,h_
400,r_
max,e_
brightness:8,f_
png
We can access it directly through the URL as below
http://imgx-ss.bscstorage.com/imgx-test/c_
thumb,g_
face,w_
400,h_
400,r_
max,e_
brightness%3A8,f_
png/demo/1.jpg?AWSAccessKeyId=acc_
drdrxp&Expires=2464773122&Signature=4cwxt1e%2Fg2NL1OfsldaVsa8SD9s%3D
OR
http://imgx-test.imgx-ss.bscstorage.com/c_
thumb,g_
face,w_
400,h_
400,r_
max,e_
brightness%3A8,f_
png/demo/1.jpg?AWSAccessKeyId=acc_
drdrxp&Expires=2464773122&Signature=4cwxt1e%2Fg2NL1OfsldaVsa8SD9s%3D
Or you could create a Jason file if you do not want to expose the processing instruction in the URL.
[
{
"crop" : "thumb",
"gravity" : "face",
"width" : 400,
"height" : 400,
"radius" : "max",
"effect" : "brightness:8",
"format" : "png"
}
]
Save the File to the path which belongs to your bucket.
<p>imgx/cmd_
template/my_
thumb.json    </p><p>#The ‘my_
thumb’ is a custom name by yourself.</p>
Then the user could access it through the below URL which means the processing instruction can be hidden to the Jason File.
http://imgx-ss.bscstorage.com/imgx-test/t_
my_
thumb/demo/1.jpg?AWSAccessKeyId=acc_
drdrxp&Expires=2464773563&Signature=WIMaNLacGaPRAlA6fl%2BGAsStfoQ%3D
Processing Format
- The connection between the Processing name and the Processing value is ‘_’ such as
c_fit. - Related instructions are separated by commas such as
c_
fit,w_100,h_100,g_face
. - Different instructions are separated by ‘--’, such as
c_
fit,w_100,h_100,g_face,r_max--l_text:my_font:hello+word,w_100,h_40
Signature
To protect your original image from theft and processing instructions from malicious abuse, signature protection must be used here. The signature form is fully compatible with AWS V2 authentication. The following provides a PHP function to generate the URL of the generation signature:
/**
* Get a query string authenticated URL
*
* @param string $accessKey AccessKey
* @param string $secretKey SecretKey
* @param string $bucket Bucket name
* @param string $uri Object URI
* @param integer $lifetime Lifetime in seconds
* @param boolean $hostBucket Use the bucket name as the hostname
* @param boolean $https Use HTTPS ($hostBucket should be false for SSL verification)
* @return string
*/
function getAuthenticatedURL($accessKey, $secretKey, $bucket, $uri, $lifetime, $hostBucket = false, $https = false, $endpoint = 'imgx-ss.bscstorage.com') {

$expires = time() + $lifetime;
$uri = str_
replace(array('%2F', '%2B', '%2C', '%3A', '%20'), array('/', '+', ',', ':', '+'), rawurlencode($uri));
return sprintf(($https ? 'https' : 'http').'://%s/%s?AWSAccessKeyId=%s&Expires=%u&Signature=%s',
$hostBucket ? $bucket : $endpoint.'/'.$bucket, $uri, $accessKey, $expires,
urlencode(base64_
encode(hash_
hmac('sha1', "GET\n\n\n{$expires}\n/{$bucket}/{$uri}", $secretKey, true))));
}
//The usage method
echo getAuthenticatedURL('your accessKey', 'your secretKey', 'your bucket', 'the processing instruction/the File path', 'the Expired time (s)');
# We recommend to set the value of $lifetime more longer, such as 1000000000.
Cache & CDN
- The cached will be generated automatically after processing the image and the same request will not be generated. The default expired time is 2 days.
- If the user configures the CDN address, the processed image will be automatically sent to the distributed nodes.
The Processing Instructions
The processing instructions are introduced below, and the following original pictures are used as examples for your comparison.
| Processing instruction name | processing instruction | Value | example | Description |
|---|---|---|---|---|
| crop | c | mode | Clipping mode, which specifies how the image is clipped or scaled | |
| scale |  |
Changes the size of the image to match the expected width and height. All parts of the original image will be visible but maybe stretched out of shape.
c_scale,h_80,w_80 |
||
| fill |  |
Crop the image while retaining its original proportions
c_fill,h_80,w_80 |
||
| lfill |  |
The mode is the same as fill, but the difference is to limit the size of the image to no larger than the original.
c_lfill,h_80,w_80 |
||
| fit |  |
Change the size of the image to match the expected width and height, while retaining the original proportions, and all parts of the original image will be visible. Equal scale shrinkage, no deformation due to stretching.
c_fit,h_80,w_80 |
||
| mfit |  |
The mode is the same as fit, but the difference is to limit the size of the image to no less than the original.
c_mfit,h_80,w_80 |
||
| limit |  |
The mode is the same as fit, but the difference is that the image size after processing will not exceed the original image.
c_limit,h_80,w_80 |
||
| pad |  |
Specifies the size of the image while retaining the original scale. If the original scale does not meet the specified size, it will be filled with a background color.
c_pad,h_80,w_80,g_center,b_dddddd |
||
| lpad |  |
The mode is the same as pad, but the difference is that if the size specified is larger than the original, the original will not be enlarged.
c_lpad,h_640,w_640,g_center,b_dddddd |
||
| mpad |  |
The mode is the same as pad , but the difference is to limit the size of the image to no less than the original.
c_mpad,h_,w_80,g_center,b_
dddddd |
||
| crop |  |
Specifies the size and position used to crop out a portion from the original image.
c_crop,h_210,w_210,g_face |
||
| thumb |  |
To locate the face (combined with the 'face' or 'faces' gravity parameters) and generate a thumbnail image, often used to generate an avatar.
c_thumb,h_250,w_250,g_face |
||
| width | w | Pixels or percentages | width parameter, use with crop or overlay | |
| 80 |  |
Adjust the width to 80 pixels
w_
80 |
||
| 0.1 |  |
Adjust the image to 10% of its original size.
w_0.1 |
||
| height | h | Pixels or percentages | Height parameter, Use with crop or overlay | |
| 80 |  |
Adjust the height to 80 pixels
h_80 |
||
| 0.1 |  |
Adjust the image to 10% of its original size
h_0.1 |
||
| gravity | g | To specify a position or direction | 1. Use 'crop', 'pad', 'fill' to specify clipping mode; 2. Use to specify the overlay position |
|
| north_west |  |
Upper left position
c_crop,g_north_west,h_200,w_200 |
||
| north |  |
Straight up, horizontally centered
c_crop,g_north,h_200,w_200 |
||
| north_east |  |
Upper Right position
c_crop,g_north_east,h_200,w_200 |
||
| west |  |
On the left, vertically centered
c_crop,g_west,h_200,w_200 |
||
| center |  |
The middle
c_crop,g_center,h_200,w_200 |
||
| east |  |
On the right, vertically centered
c_crop,g_east,h_200,w_200 |
||
| south_west |  |
Lower left position
c_crop,g_south_west,h_200,w_200 |
||
| south |  |
Straight down, horizontally centered
c_crop,g_south,h_200,w_200 |
||
| south_east |  |
Lower right position
c_crop,g_south_east,h_200,w_200 |
||
| xy_center |  |
The Specified x,y coordinates, and as the center point
c_crop,g_xy_center,
h_400,w_400,x_245,y_240 |
||
| face |  |
Automatically locate the face if there are multiple faces, choose the one that is easiest to recognize.
c_crop,g_face,h_140,w_140 |
||
| face (thumb) |  |
Automatically locate the position of the face and generate thumbnails according to the specified size. If there are multiple faces, choose the one that is easiest to recognize.
c_thumb,g_face,h_130,w_140,f_png |
||
| faces |  |
Automatically located the position of the multiple faces
c_thumb,g_faces,h_220,w_600,
e_brightness:18 |
||
| face:center |  |
Automatic to locate the location of the face, if you cannot find the face is automatically positioned to the center of the original picture.
c_thumb,g_face:center,h_140,w_140 |
||
| faces:center |  |
Automatic positioning to the location of multiple faces, if the face cannot be found automatically positioning to the center of the original picture.
c_thumb,g_faces:center,
h_120,w_330,e_brightness:18 |
||
| x | x | Pixels | Use to specify the horizontal coordinates of a cropping or watermark image | |
| 110 |  |
Crop the image at 180x180 pixels, starting at 110 pixels on the left
c_crop,h_180,w_180,x_110 |
||
| y | y | Pixels | To Specify the vertical coordinates of a cropping or watermark image | |
| 230 |  |
Crop the image at 180x180 pixels, starting at 230 pixels at the top
c_crop,h_180,w_180,x_180,y_230 |
||
| quality | q | percentage | Controls the compression quality of JPG or WEBP images. The minimum value is 1 and the maximum value is 100 | |
| 100 |  |
Image quality is 100% and file size is 14.3KB
c_thumb,g_face,h_130,w_140,q_100 |
||
| 10 | 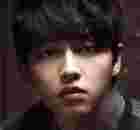 |
Image quality is 10% and file size is reduced to 1.5KB
c_thumb,g_face,h_130,w_140,q_10 |
||
| radius | r | Pixel or 'Max' | ## Specifies radius, generates rounded corners or becomes completely round (oval) | |
| 30 |  |
Generates rounded corners with a radius of 30 pixels
c_thumb,g_face,h_140,w_140,f_png,r_30 |
||
| max |  |
Use the maximum radius to generate rounded corners
c_thumb,g_face,h_140,w_140,f_png,r_max |
||
| angle | a | Angle or flip mode | Flip or rotate the image | |
| 90 |  |
Rotate 90 degrees clockwise
c_fill,h_80,w_80,a_90 |
||
| 10 |  |
Rotate 10 degrees clockwise
c_fill,h_80,w_80,a_10 |
||
| -20 | 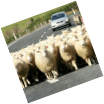 |
Rotate 20 degrees counterclockwise
c_fill,h_80,w_80,a_-20 |
||
| vflip |  |
flip vertical
c_fill,h_80,w_80,a_vflip |
||
| hflip |  |
flip horizontal
c_fill,h_80,w_80,a_hflip |
||
| effect | e | name and value | Use filters or special effects | |
| grayscale | 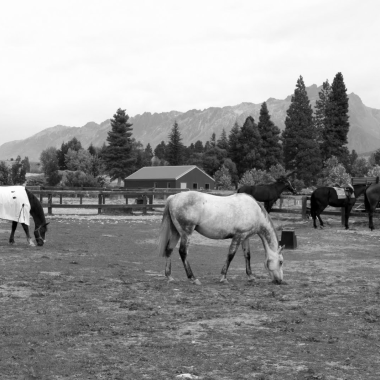 |
gray level
c_fill,h_380,w_380,e_grayscale |
||
| oil_ paint |  |
Canvas effect
c_fill,h_380,w_380,e_oil_paint |
||
| oil_paint:2 | 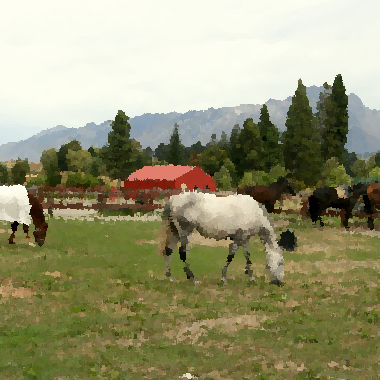 |
Use the oil painting effect and specify a level value of 2. The value ranges from 1 to 8. The default value is 4
c_fill,h_380,w_380,e_oil_paint:2
|
||
| negate |  |
reverse color
c_fill,h_380,w_380,e_negate:2
|
||
| brightness:28 | 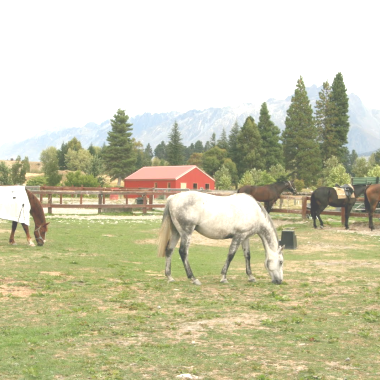 |
Adjust the brightness of the image and specify a percentage value of 28. The value ranges from -100 to 100. The default value is 30.
c_fill,h_380,w_380,e_brightness:28
|
||
| brightness:-28 | 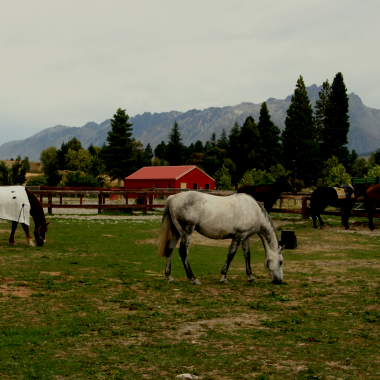 |
Adjust the brightness of the image and specify a percentage value of -20. The value ranges from -100 to 100. The default value is 30.
c_fill,h_380,w_380,e_brightness:-20
|
||
| blur |  |
blur effect
c_fill,h_380,w_380,e_blur
|
||
| blur:300 |  |
Use the blur effect and specify a level value of 300. The value ranges from 1 to 2000. The default value is 100.
c_fill,h_380,w_380,e_blur:300
|
||
| pixelate |  |
pixelate
c_fill,h_380,w_380,e_pixelate:20
|
||
| pixelate:40 |  |
Use the pixelated effect and specify a level value of 40. The default value is 5.
c_fill,h_380,w_380,e_pixelate:40
|
||
| sharpen | 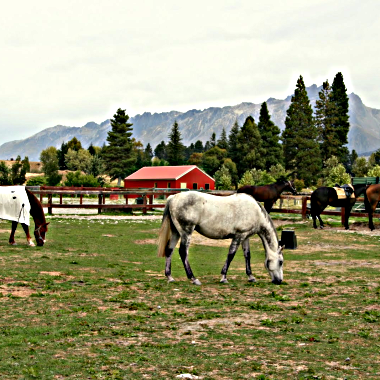 |
Sharpen
c_fill,h_380,w_380,e_sharpen
|
||
| sharpen:400 |  |
Use sharpening and specify a level value of 400. The value ranges from 1 to 2000. The default value is 100.
c_fill,h_380,w_380,e_sharpen:400
|
||
| auto_ contrast |  |
Auto Contrast
c_fill,h_380,w_380,e_auto_contrast
|
||
| improve |  |
Automatically adjust the image color, contrast, and brightness
c_fill,h_380,w_380,e_improve
|
||
| sepia |  |
Add brown to achieve the old photo effect
c_fill,h_380,w_380,e_sepia
|
||
| sepia:60 |  |
Add brown to achieve the old photo effect and specify a level value of 60. The value ranges from 1 to 100. The default value is 80.
c_fill,h_380,w_380,e_sepia:60
|
||
| red:40 |  |
Add Red
c_fill,h_380,w_380,e_red:40
|
||
| green:40 |  |
Add Green
c_fill,h_380,w_380,e_green:40
|
||
| blue:40 |  |
Add Blue
c_fill,h_380,w_380,e_blue:40
|
||
| yellow:40 |  |
Add Yellow
c_fill,h_380,w_380,e_yellow:40
|
||
| cyan:40 |  |
Add Brown
c_fill,h_380,w_380,e_cyan:40
|
||
| magenta:40 | 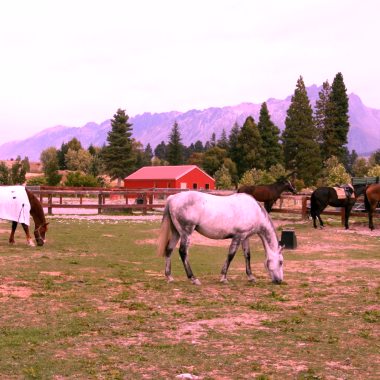 |
Add Pink
c_fill,h_380,w_380,e_magenta:40
|
||
| opacity | o | Percentage | Controls the opacity of PNG or WEBP images. The minimum value is 1 and the maximum value is 100 | |
| 25 |  |
The Opacity is 25%
h_330,w_330,o_25
|
||
| border | bo | style | set Border | |
| 10_ 0000004a |  |
Set a border width to 10px, color to black, and opacity to 4A (hexadecimal).
h_330,w_330,bo_10_0000004a
|
||
| 8_bbbbbb | 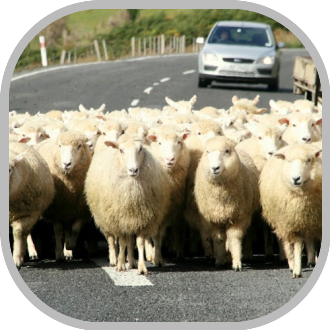 |
Set a border width of 8px and a color value of bbbbbb for the rounded image
h_330,w_330,bo_8_bbbbbb,r_
100
|
||
| background | b | color | Set the background color with other commands | |
| dddddd |  |
Set the background color to the color value dddddd
c_pad,w_380,h_180,b_dddddd
|
||
| fff6def0 |  |
Set the background color to fff6de and opacity to f0 (hexadecimal)
c_fill,h_110,w_110,a_30,b_fff6def0
|
||
| dbeced |  |
Set the background color to the color value dddddd
c_fill,h_140,w_140,r_max,b_dbeced--c_lpad,g_center,w_152,h_152,b_dbeced
|
||
| overlay | l | Use watermark picture name, or use font to describe the file name, etc | Add a watermark to the original image. And you can use the W, H, X, Y ,and gravity parameters to control the size and position of the watermark, and the O parameter to control the transparency of the watermark. | |
| superman |  |
Add a watermark of square face superman in the bottom right corner of the image (support external area). Firstly, you need to save the watermark map (must be in PNG format) to your corresponding bucket, the File path is imgx/overlay/ myname.png, and then you can use the l_my_name command to do the watermark operation.
c_fill,w_500,h_500,g_face,
f_png--l_superman,g_south_east,
w_250,x_-120,y_-60--l_scs_logo,x_20,y_20
|
||
| text:font_me:Hello, BaishanCloud | 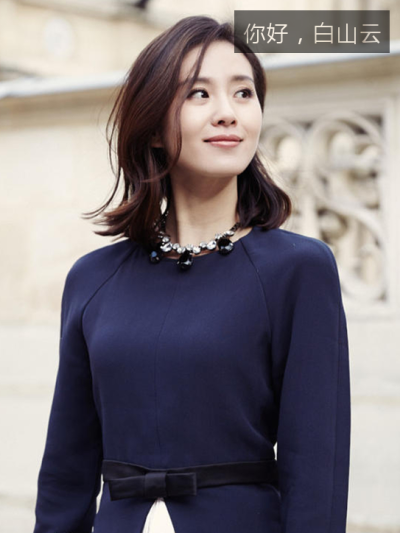 |
Text watermark. More on font style Settings later
l_text:font_me:Hello, BaishanCloud
g_north_east,x_14,y_14--w_400
|
||
| format | f | Image Format | Image format transfer | |
| png | f_png |
|||
| webp | f_webp |
|||
| jpeg | f_jpeg |
|||
| jpg | f_jpg |
|||
| version | v | Version | Specifies the version to regenerate the image if the cache has not expired | |
| 1.21 | decimalv_1.21 |
|||
| 13 | integerv_
13 |
|||
| transformation | t | Name | "Instruction set", the instructions can be saved to the specified path using jSON-formatted files instead of urls | |
| my_thumbs |
Custom Name. Under the corresponding bucket, create the file:imgx/cmd_template/my_thumbs.json
t_my_thumbs
|
|||
| information | i | information type | Retrieves picture information for the specified type | |
| exif | exif | i_exif, Returns information about the image exif in JSON format | ||
| iptc | iptc | i_iptc, Returns the IPTC information of the image in JSON format | ||
| all | all | i_all, Returns all information about the image in JSON format |
Access the image processing service by using AWS-SDK
You can access the image processing service directly using the standard AWS-SDK.
Note: The IMGx service only accepts the standard 'get_ object' operation. All other operations are illegal.
The following example code uses python boto3 sdk:
import boto3

s2_imgx_domain_name = 'http://imgx-ss.bscstorage.com'   # This example uses the three-copy cluster configuration, which needs to be adjusted based on different clusters.
s2_imgx_access_key = 'xxxxxx'                           # User own access key
s2_imgx_secret_key = 'xxxxxx'                           # User own secret key

imgx_cmd = 'c_scale,w_100,h_100' # Picture processing commands, refer to the picture processing instructions section.
imgx_bucket = 'my_imgx_bucket'   # The name of the user's bucket on the storage
imgx_key = 'my_img.jpg'          # The key name of the image that the user wants to manipulate.


# Create s2 client
imgx_cli = boto3.client('s3',
endpoint_url=s2_imgx_domain_name,
aws_access_key_id=s2_imgx_access_key,
aws_secret_access_key=s2_imgx_secret_key)

imgx_cmd_key = u'{cmd}/{key}'.format(cmd=imgx_cmd, key=imgx_
key) # As the Key on final access
resp = imgx_cli.get_object(Bucket=imgx_bucket, Key=imgx_
cmd_key)

print resp
Instruction about the watermark function
- WaterMark type:
picture watermarkingandtext watermarking. - If you use the watermark
lcommand, other instructions will be combined withlto process thewatermark image or text(e.g.w、h、g、x、y、o、bo、e、a、r, etc.)
Picture Watermark
You need to save the watermark texture to the corresponding bucket imgx/overlay/<filename>.png in advance. The image must be in png format. The following two images are examples.
| watermark texture | corresponding path | corresponding command |
|---|---|---|
| imgx/overlay/icon_v.png | l_icon_v |
|
 |
imgx/overlay/bs_logo.png | l_bs_logo |
The following are examples of specific functions
| example | description | processing instruction |
|---|---|---|
 |
1. Scale the original image proportionally; 2. Add an image watermark to the upper left corner of the original image, fine-tune the coordinates (x_43, y_20), set the width of the watermark to 120px, the opacity to 35%, and rotate the watermark 10 degrees counterclockwise. |
c_fit,w_300,f_png--
l_bs_logo,g_north_west,
w_120,o_35,x_43,y_20,a_-10
|
|
1. Process the original image into a rounded avatar 2. Add a watermark image in the lower right corner, fine-tune the watermark coordinates (x_-1, y_-5) outward, and set the width of the watermark image to 60px. |
c_thumb,g_face,w_200,h_200,
r_max,bo_6_ffffff80,f_png--l_icon_v,
g_south_east,w_60,x_-1,y_-5
|
|
|
1. As above 2. Invert the watermarked image |
c_thumb,g_face,w_200,h_200,
r_max,bo_6_ffffff80,f_png--l_icon_v,
g_south_east,w_60,x_-1,y_-5,e_negate
|
Text Watermark
Please save the font configuration of the text watermark (json formatted file) to the corresponding bucket imgx/overlay/<file>.json in advance, for example,
{
"font_family" : "Xingkai SC",
"font_style" : "bold",
"font_size" : 30,
"font_color" : "000000",
"background" : "ff0000cc",
"padding" : 10,
"word_spacing" : 1,
"kerning" : 1,
"line_spacing" : 2,
"pierced" : false,
"tile" : false,
"text" : "Default Value",
}
Corresponding path: imgx/overlay/my_font.json
Introduction of font parameters
All parameters are not required
| parameter name | description | default value |
|---|---|---|
| font_family | All fonts we support | Songti SC |
| font_style |
Font style (only effective if the font itself supports the following styles, otherwise normal is used by default):
normal(normal) italic(italic face) bold(bold face) light(light face type) |
normal |
| font_size | font size(px) | 14 |
| font_color | Hexadecimal rgba (the first 6 are rgb, the last 2 bits of alpha are 0 to f), if the last two digits are omitted, it is considered opaque | Black(000000) |
| background | 16Hexadecimal rgba (the first 6 are rgb, the last 2 bits of alpha are 0 to f), if the last two digits are omitted, it is considered opaque | transparent(ffffff00) |
| padding | The width of the padding around the text(px) | 6 |
| word_spacing | character spacing(px) | 0 |
| kerning | word spacing(px) | 0 |
| line_spacing | Line spacing(px) | 0 |
| pierced | cutout effect(bool value) | false |
| tile | Whether to tile(bool value) | false |
| text | default string | empty string |
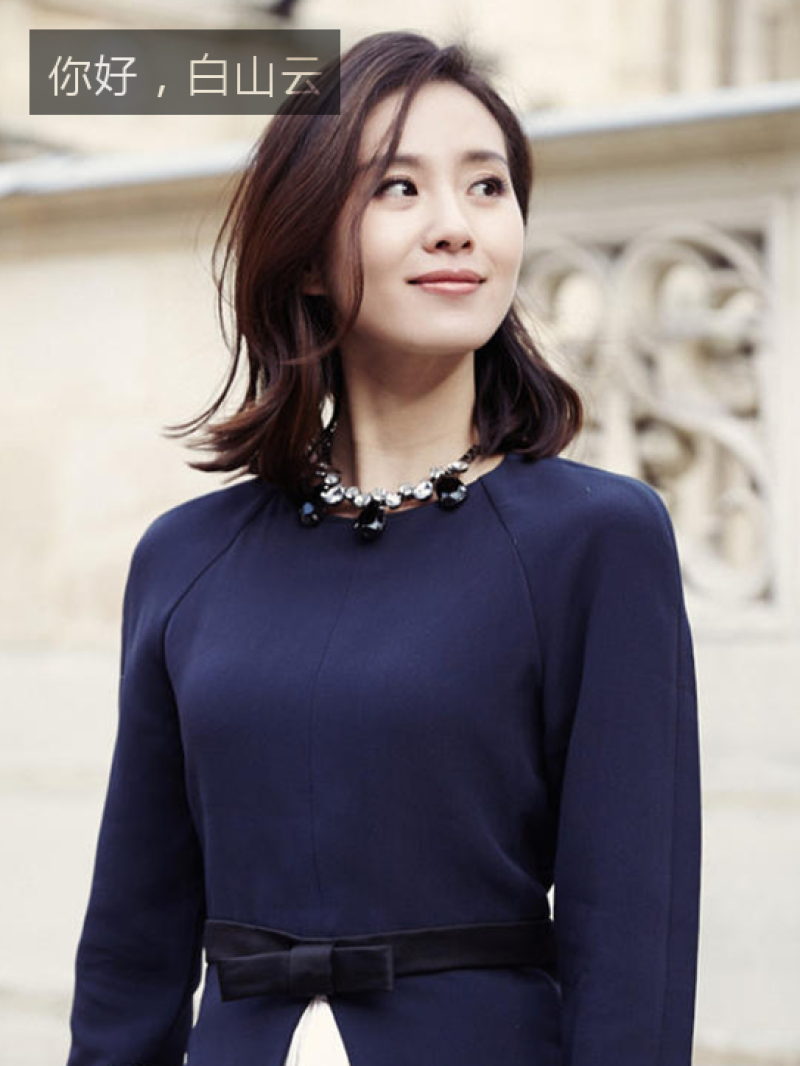
Example 1
imgx/overlay/simple_font.json :
{
"font_family" : "Microsoft YaHei",
"font_size" : 40,
"font_color" : "ffffff"
}
The simplest text watermarks

Processing Instruction:
w_800,f_png--l_text:simple_font:Hello+Bai+Shan!!,x_20,y_20,a_-25
Example 2
imgx/overlay/subtitles.json :
{
"font_size" : 22,
"font_color" : "ffffff"
}
imgx/overlay/subtitles_s.json :
{
"font_size" : 16,
"font_color" : "ffffff"
}
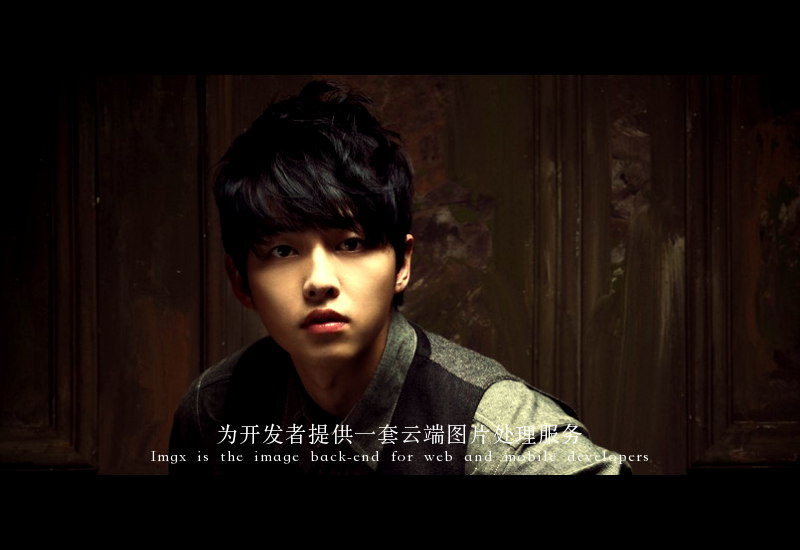
Let's create a blockbuster effect and apply it to two images:
Processing Instruction:
f_png,c_fill,w_800,h_400,e_brightness:-8--c_pad,w_800,h_550,g_center,b_000000ff,e_yellow:30--l_text:subtitles: There is a set of cloud image processing services,g_south,y_
100--l_text:subtitles_s:Imgx is the image back-end for web and mobile developers,g_south,y_80
Example 3
imgx/overlay/my_font.json :
{
"font_family" : "Xingkai SC",
"font_style" : "bold",
"font_size" : 40,
"font_color" : "000000",
"background" : "ff0000cc",
"padding" : 18
}
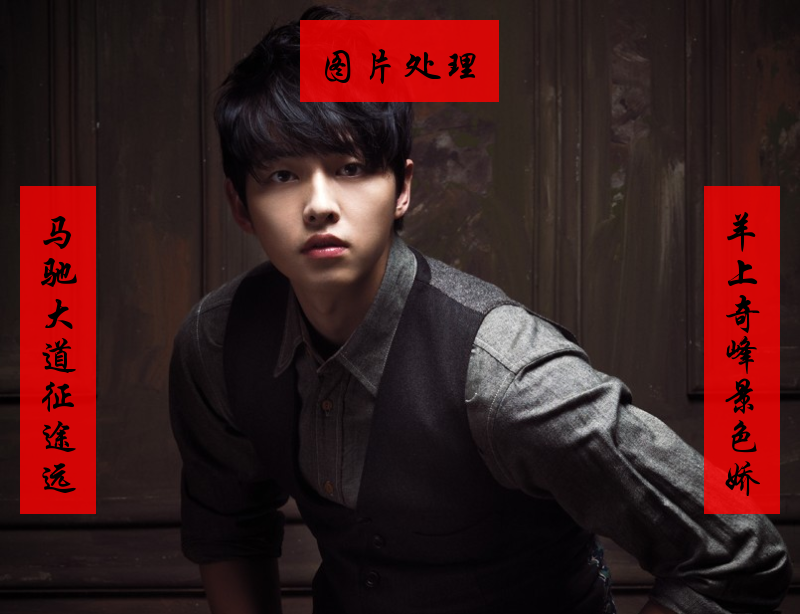
Let's make a couplet:
Processing Instruction:
w_800,f_png--l_text:my_font,g_south_west,w_40,x_20,y_100--l_text:my_font,g_south_east,w_40,x_20,y_100--l_text:my_font,g_north,y_20
Example 4
imgx/overlay/font_me.json :
{
"font_family": "Microsoft YaHei",
"font_size": 30,
"font_color": "ffffff",
"font_style": "bold",
"background": "0000008f",
"pierced": true,
"tile": false,
"padding": 12,
"word_spacing": 2.2,
"line_spacing": 1.2,
"kerning": 1.5
}
Cutout Effect
指令:
l_text:font_me: Hello,BaishanCloud,g_north_west,x_20,y_20--w_800
Example 5
imgx/overlay/tile.json :
{
"font_family" : "Microsoft YaHei",
"font_style" : "bold",
"font_size" : 40,
"font_color" : "000000",
"background" : "ff000066",
"padding" : 18,
"tile": true
}
tiling effect

Processing Instruction:
w_800,f_png--l_text:tile:Hello BaiShan!!,g_south
Example 6
imgx/overlay/badge.json :
{
"font_style" : "bold",
"font_size" : 30,
"font_color" : "ffffff",
"background" : "ff0000cc",
"padding" : 15
}
Add a badge
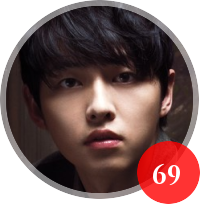
Processing Instruction:
c_thumb,g_face,w_200,h_200,r_max,bo_6_ffffff80,f_png--l_text:badge:69,r_max,g_south_east,w_34,h_34,x_-1,y_-5
Use the "instruction set"
If you don't want to expose the directive in the URL, this is an example to automatically recognize the face position on a photo and make a circular thumbnail with a border:
Firstly, create a json file and save it to the corresponding bucket: Path:
imgx/cmd_template/avatar.json:[ { "crop" : "thumb", "gravity" : "face:center", "width" : 200, "height" : 200, "radius" : "max", "border" : "6_ffffff80", "format" : "png" }, { "overlay" : "icon_v", "gravity" : "south_east", "width" : 60, "x" : -1, "y" : -5 } ]Access via the below way.
http://imgx-ss.bscstorage.com/imgx-test/t_avatar/demo/1.jpg?<signature>
http://imgx-ss.bscstorage.com/imgx-test/t_avatar/demo/3.jpg?<signature>
- Effect:


Font (font_family)
The API to query fonts: http://imgx-ss.bscstorage.com/fonts